Wednesday, June 22, 2011

Assignment 2 - Draft Storyboard


Assignment 2 - Storyline

A total of 4 effects and 1 title sequence:

1. Title sequence: http://www.videocopilot.net/tutorials/smoke_screen/

2. Orbing/teleporting: http://www.youtube.com/watch?v=ZlhM-RY_y4Q

3. Force field: http://vimeo.com/6833954
Explosion: http://www.youtube.com/watch?v=N6MrB-ltmxQ
(To enhance on the force field, but i am just going to use the explosion footage so i will probably not consider it is an effect.)

4. Light saber: http://www.videocopilot.net/tutorials/light_sabers_v2/
Blue fire: http://www.youtube.com/watch?v=CAUgxX6dHDo
(I feel that the light saber is a little plain/simple so I have decided to add blue fire as an enhancement.)

5. Illuminating light painting: http://ae.tutsplus.com/tutorials/vfx/create-an-illuminating-light-painting-effect/


Story title: Aftermath
(I will be doing the effects in blue.)
1. Show/shoot environment
  • Lightning effect with thunder sound
  • Fog effect to enhance the environment
2. Carol appear by Ground Burst Jump effect
3. ZhenHong appear by orbing/teleporting effect
4. ZhenHong gain lightning from the sky
5. ZhenHong’s eye changes to blue color due to absorbing lightning from the sky
6. ZhenHong attack with force lightning
7. Carol shield and counterattack with fire ball
8. ZhenHong defends with force field and force field reflects the fire ball and explodes when reach the ground
9. ZhenHong attacks with energy ball
10. Carol jump/dodge the energy ball and attack with airbender
11. ZhenHong step back due to the force of airbender
12. ZhenHong takes out the wand/stick from his pocket, light up the wand/pen and attacks with light saber
13. While ZhenHong charge towards Carol with his light saber, disappears with hancock fly
14. ZhenHong looks blur
15. Carol appears back-faced behind him with thor hammer effect and she attacks with flying blade
16. Zhenhong turns around when he heard the impact of the landing behind him
17. The blade went across his cheek and cause a wound, he turns with a stare and the wound heals
18. Zhenhong not willing to give up, he charged towards carol with his light saber once again
19. Carol attacks with Cyclops effect with muzzle flash
20. Zhen hong shield with protégé shield with water ripple and put aside his light saber (glow fades out)
21. While the wand/pen is on zhen hong’s hand, he cast a spell (light painting) and shoots out an energy ball
22. Carol clones (double image) and explodes
23. Zhenhong gained victory
24. Carol appears behind zhen hong

Monday, June 13, 2011

Assignment 1 Final - Combined


This is the combined/my final video. I have also added in some text/captions.

Assignment 1 Final - Destination


I think that it would look weird without showing that I have reached my destination. Thus, I have decided to have another scene and to film this footage in school as my destination.

The steps to create this effect for this scene is almost the same as the Magic Portal scene, except that my mask expansion is from a value of -80 to 0 pixels.

Likewise, I have also used the "CC Particle World" effect (Effect> Simulation> CC Particle World) when I walk out from the magic portal to look more magical. After walking for a little distance, I stop to look at my watch/the time and smiled because I am not late. After that, I continued walking to my final destination.

Assignment 1 Final - Magic Portal


I have filmed and used another footage in a different camera angle and it is more close up compared to the previous version.

The have set 2 keyframes for the mask expansion, from a value of 0 to -80 pixels so that it will look like I walk into the wall/magic portal.

I have also enhanced this scene by using/adding on the "CC Particle World" effect (Effect> Simulation> CC Particle World) when I am walking into the magic portal so that it will look more magical.

Assignment 1 Final - Magic Pen


I have filmed and used a new footage because the previous version is a little too shaky. I have done this video in the same way/with the same steps as the previous version that I have posted.

Assignment 1 Final - Teleport


I am not too sure where to enhance so nothing has been enhanced from the previous teleporting effect video that I have posted. But only edited the brightness & contrast.

Assignment 1 Final - Waiting for bus


This is the second scene. In my previous version, I have showed my watch which I think that it does not really give the mood/feel that I am going to be late. Thus, I have filmed this version of me looking very impatient and stretching my neck to see whether the bus is here.

For this scene, I have done some editing and cutting of the footage and also changed the brightness & contrast.

Assignment 1 Final - Cloud Text


There are some changes made. Firstly, I have filmed and used a new footage because I think that the length of the previous footage is a little short and a little too rush.

Secondly, rather than dissolving in the cloud title and do motion tracking so that it will stay in that position even if the camera moves, I think that it would be better if the cloud title dissolves in and dissolves out before the camera moves.

Furthermore, the length of showing the cloud title should be appropriate so that people will notice or have more focus on the cloud title.

Sunday, June 5, 2011

Assignment 1 Progressive Work - Teleport


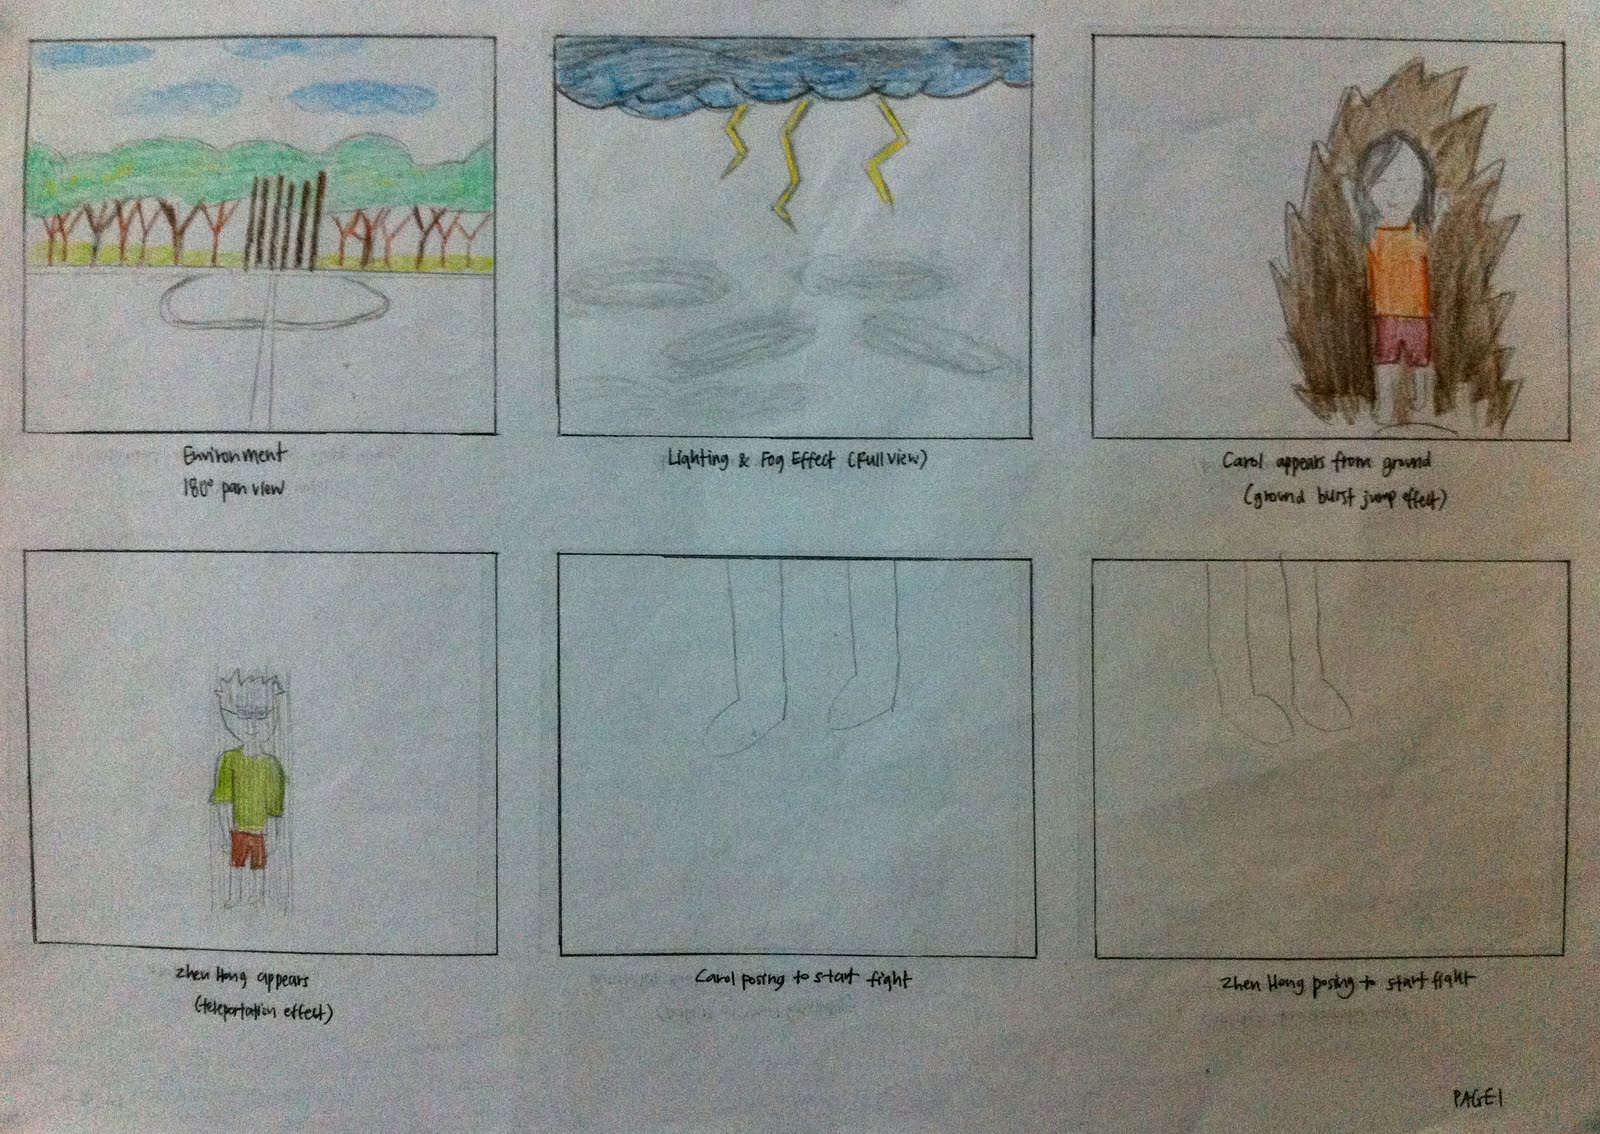
I have used the disappearing effect from the tutorial (link: http://www.youtube.com/watch?v=LcF_I_OT480) to create this teleporting effect. I find that it doesn't look like a teleporting effect if I didn't use any additional effect.

I have watched some tutorials on the internet for the orbing/teleporting effect but it seems like I have to create the effect with Adobe Photoshop which can be a little difficult. I wanted to create something like this -> (link: http://www.youtube.com/watch?v=OeN-rrC0qY4).

Hence, i have explored the effects available on Adobe After Effects and I have decided to use the effect "Scribble" (Effect> Generate> Scribble).

I actually had fun creating this teleporting effect as I get to explore and figure out how to enhance/make it look more like a teleporting effect rather than just following a tutorial.


Steps (for the disappearing effect):


1. Create a new solid and apply the fractal noise effect (Effect> Noise & Grain> Fractal Noise).

2. Set keyframe by clicking on the "stopwatch" beside Evolution (under the Fractal Noise Effect) in the 1st frame. Then go to the last frame and change the Evolution value to "5x" so that the effect will have some movements.

3. Also, set keyframe by clicking on "stopwatch" beside Brightness in the 1st frame. Change the brightness to a negative value (-90) so that it is pitch black and a positive value (90) so that it is completely white in the last frame.

4. Change 'TrkMat' from "None" to "Luma Matte" for the layer/footage where I have to appear and change it to "Luma Inverted Matte" for the layer/footage where I have to disappear.

5. Masking
-Using the 'Pen Tool', mask out myself in the footage where I have to appear/disappear.


Additional steps (for the Scribble effect):


6. Angle
I have changed the value from "60" to "0" so that the lines are vertical.

7. Color
To a brighter blue so that it will have a teleporting feel.

8. Stroke Options
"start: 0%" and "end: 100%" for the part where I will disappear in the video and with opposite values for the part where I will appear later on.

9. Wiggle Type
From the default "Smooth" to "Jumpy".

10. Opacity
Use the value of "50%" so that it can also lower the brightness.

11. Composite
From "On Transparent" (default) to "On Original Image" so that I can still be seen in the footage but just with an additional effect in front of me.

Before applying "Scribble" effect:
After applying "Scribble" effect: